How to Repair Broken Brick – A step by step guide
Repairing broken bricks is easy with Total Wall Care Brick Repair Mortar.
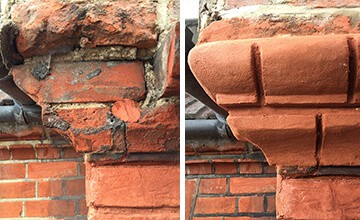
Whether damaged by impact, the elements, the removal of render, or by the use of the wrong type of mortar in the bed joint, damaged bricks are unsightly and can cause further issues with the building or structure through water ingress or failure. Repairing the damage with a cement or concrete mix not only looks unsightly but can cause more severe damage in the future due to cracking caused by the repair material being harder than the original.
Fortunately an easy to use solution to repair broken brick is now available in the form of Total Wall Care Brick Repair Mortar.
Total Wall Care Brick Repair Mortar is available in a wide range of colours and sizes and, once mixed with water, is ready to use.
Here’s how:
Mortar Preparation
- For colour consistency use a full bag of Total Wall Care Brick Repair Mortar.
- Open bagged mortar and pour into a suitable clean, dry tub.
- Mix 1 part water with 4-5 parts repair mortar. The mix should form into 1.5cm to 2.5cm balls and be slightly dry.
Repair Method
- Ensure surface to be repaired is free from dust, dirt and loose particles.
- Substrate should be pre-moistened and damp but not too wet. Weather factors such as direct sunlight must be taken into account.
- Brush away any loose and crumbling material prior to repair.
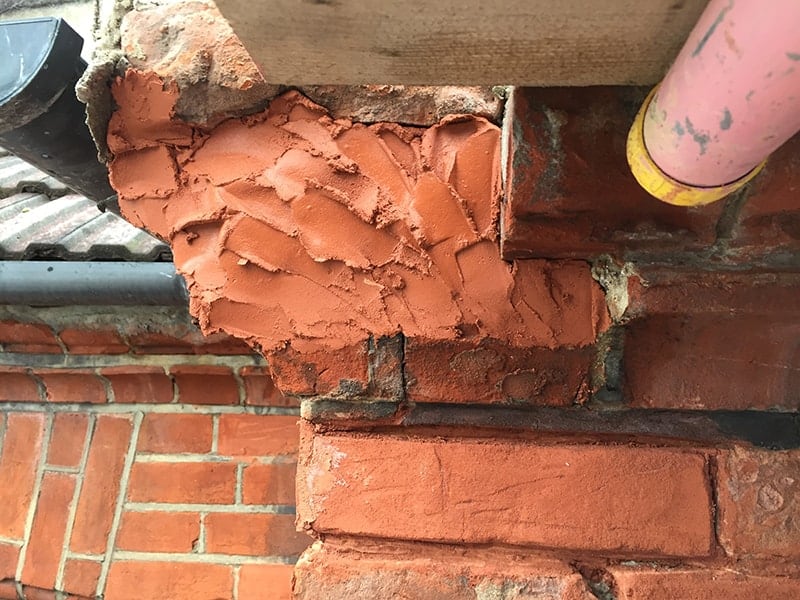
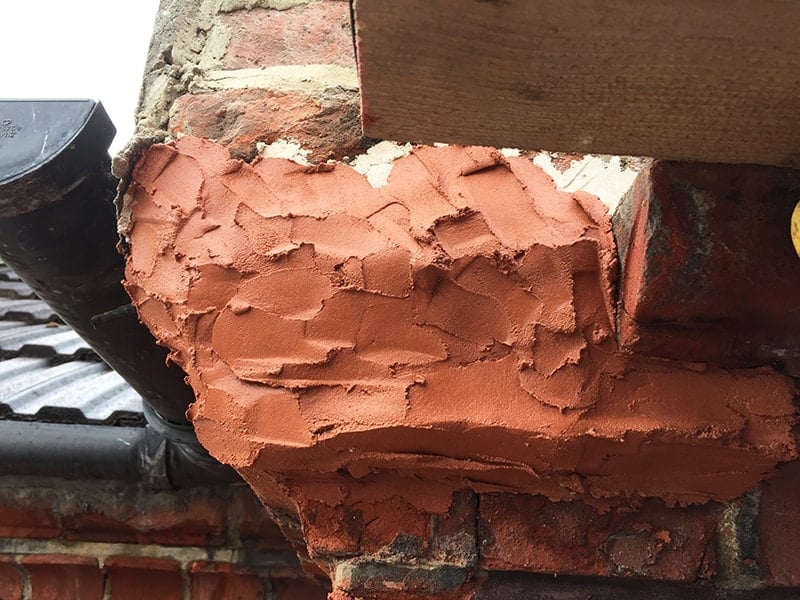
- Deep repairs should be built up in layers no more than 20mm deep and allowed to cure between layers.
- The first layer should be slightly wetter than the main mix. Roughly the consistency of smooth peanut butter.
9.1 To prepare this place a small amount of mixed mortar into a seperate, clean container and mix with a little additional water.
- Using an appropriate trowel, firmly press the mortar into the existing brick ensuring there are no gaps.
- Allow each layer to cure ensuring that any top skin that forms is scrapped back between layers.
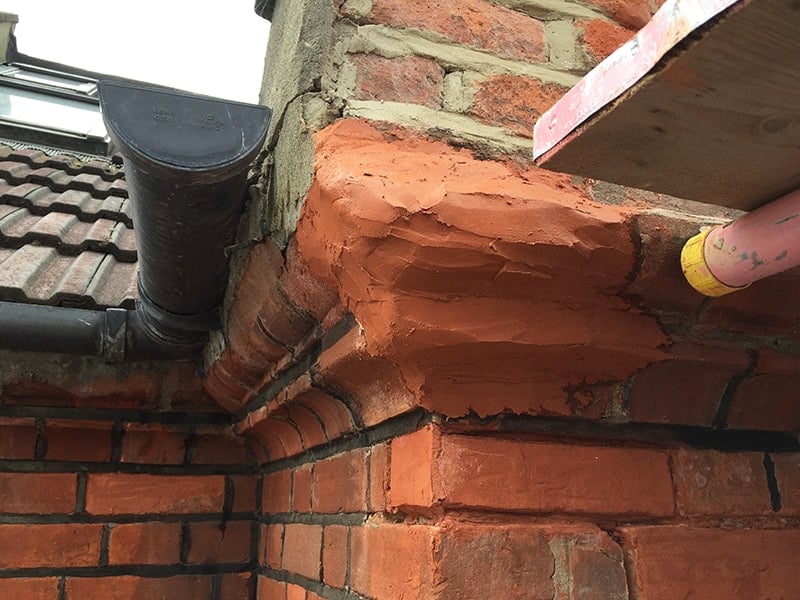
- Final layer should be 3mm to 10mm proud of the surrounding surface and allowed to cure. 3mm is sufficient for flat brick.
- The repair can be shaped and modelled with appropriate tools for up to two days after application.
Notes
- Do not apply product in temperatures below 5°C.
- In hot temperatures or direct sunlight, damp down the repair area with a water filled hand sprayer every 3 to 4 hours, or cover with damp hessian and allowed to cure.
- Clean tools with clean water.
- Remove any splatters in undesired places with clean water before they cure.
Total Wall Care Brick Repair Mortar is available in our webshop in a wide range of colours and sizes. Click here for more information.
NB. Repair deep, narrow cracks in brickwork by injecting with the specially developed Total Wall Care Colour Matched Crack Injection Mortar.


Posted on:
Categories: How To, Total Wall Care